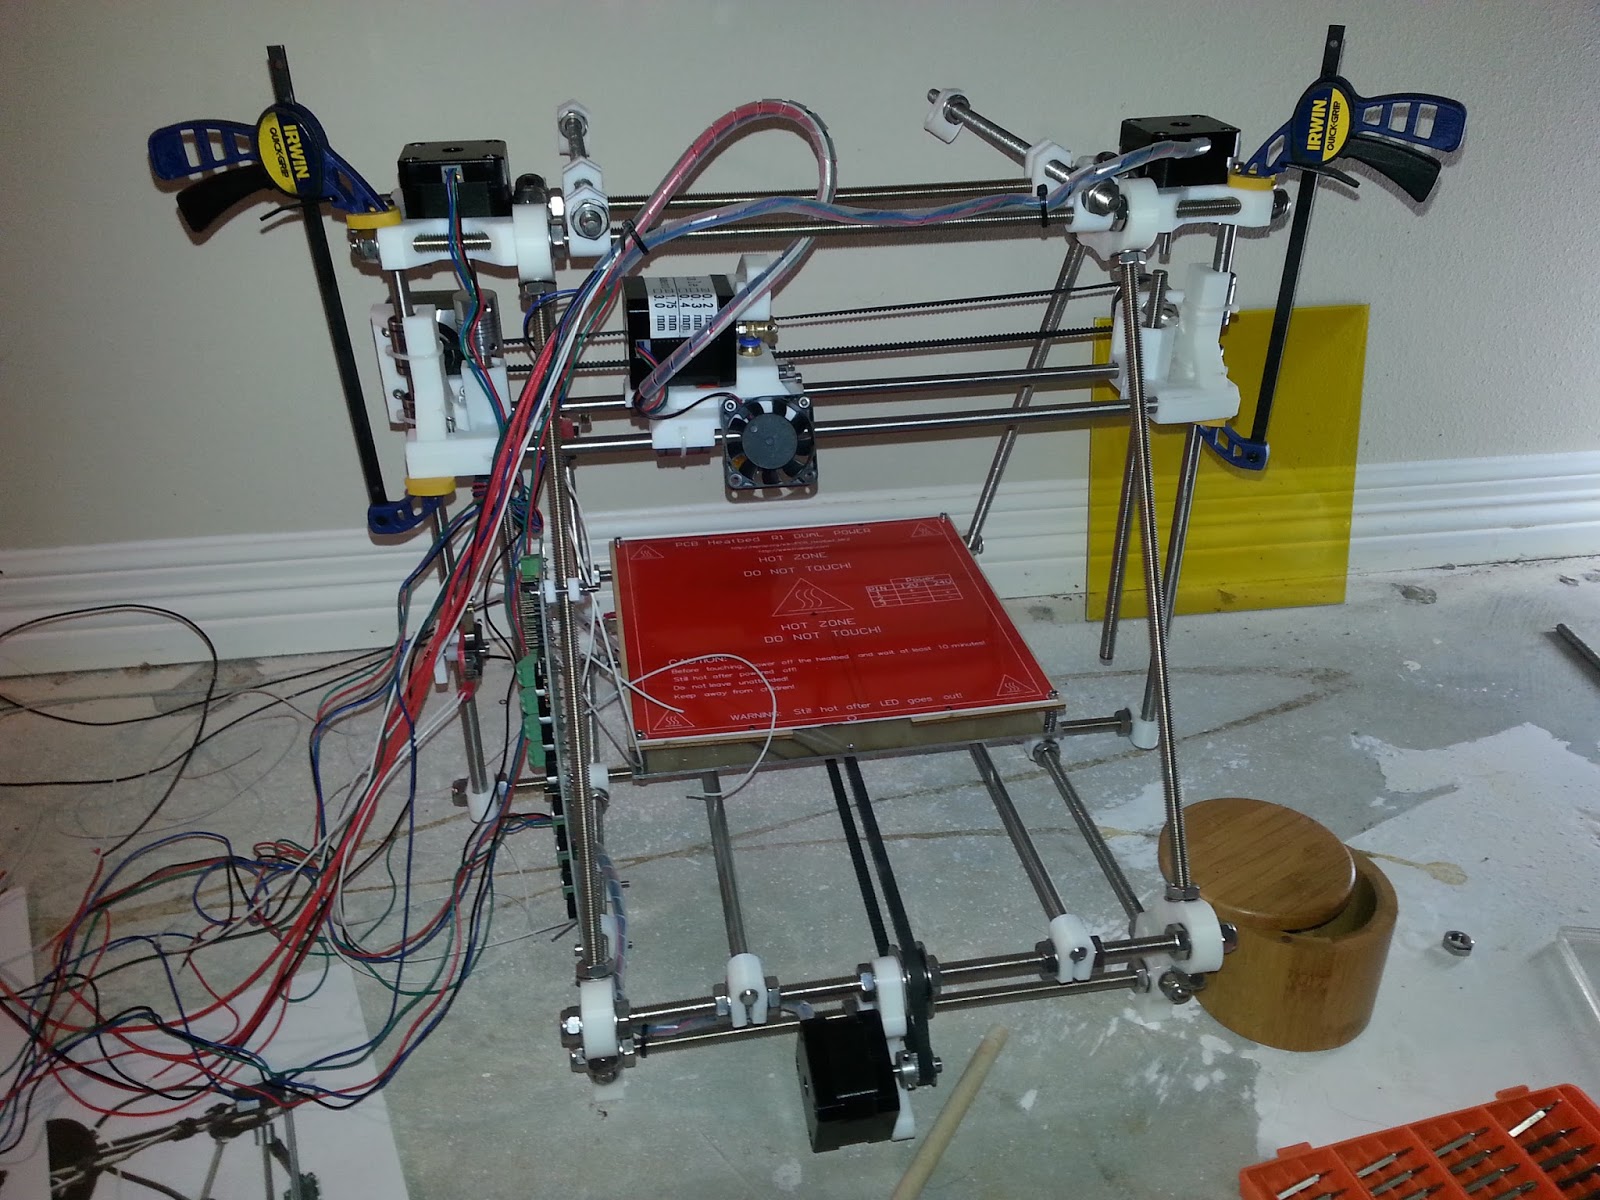
Well, I took matters into my own hands and found some compression springs at the local Home Depot. Actually they were a pretty good fit. So I have been trying to get the hang of using my machine.
Although I have some ways before I figure out how to make perfect prints, I have been encouraged by what I have been able to do with a machine I built myself.
I will begin using this blog to track my progress. Stay tuned!
Well I have to say the weekend ended better than it started. Thursday night my stomach felt terrible and I had to stay home ill on Friday. In time I began to feel better, but I was still pretty tired. And then on Saturday they delivered a pair of flexible aluminum couplers that I had order off of Ebay. I was in business! It wasn't until today however that I was able to get this thing ready to print. Most of that time was trying to figure out how the Repetier-Host software was supposed to be configured. Gotcha #1 I do not believe the firmware was pre-loaded on the Melzi board. Whenever I connected I kept getting a serial error. Then again, it may have been my baud rate. It needs to be set to 115200. Anyway, I was only successful after I had loaded the supplied Arduino program. Gotcha #2 While I realized right away that I needed to reverse the X and Z axis directions, I failed to realize that the Y axis also needed to be reversed. It is confusing to beginners because the Y axis is moving the bed, which is opposite to the direction you want to go. Gotcha #3 Calibrating the home position took quite a bit of time to figure out, with just poking and prodding. Finally, after fixing all the axis problems, the limit switches began to behave like I expected. Home is on the "origin" of the three-dimensional space cube that makes up the print area. It is the bottom left corner of the print bed. When you get all the limit switches placed to give you the most printing area, pressing the home buttons will move the particular axis to it's home position by tripping the switch. Gotcha #4 Then you have to set the size of the print area so that the printer will know when to stop on the opposite end of each axis. Anyway, I think I am ready almost ready to print. All I need are the extruder springs.
Well I bit the bullet and began wiring the printer to the CPU board. After some tedious detangling, organizing, cutting, stripping I think I am finished.
I tested and hooked up the power supply. I think I might add to the mounting of the power supply. It tends to swing when the printer is moved.
Anyway, I am about finished with what I can do, without the missing parts.
Well it is the 6th of January and this is the current state of my DIY 3D Printer Kit...
I'm doing what I can to finish the printer, while I wait for the two parts I need to complete the whole thing. I should be able to finish the wiring in the next day or two. While the rats nest of wire is a bit intimidating at the moment, I should be able to take it, one connection at a time.
Once the wiring is done, I won't be able to proceed with calibration and testing until I receive the last parts.
Well I have taken a step into the world of 3D printing. For Christmas, I was given a Heacent 3DP03 DIY 3D Printer it. I have to tell you... I was pretty intimidated.
Well I received my carbon fiber top-plate from Picnic Quads and was able to finish the FPV Racer quad. Here are some quick pictures...
I also finished the FPV Practice racer that I plan on using to practice flying the quad...
On the sad news front, my Hontai HT F803C died with a burnt out FET. Unlike the Micro MWC board, this one is black and obviously dead. GearBest was offering a replacement board for $8 so I thought why not. I liked the quad and could stand to replace it. We'll see if it ever arrives from the place.
Well, I had a disappointing evening with respect to my Micro MWC flight control board. I was moving it to a new frame from Picnic Quads and apparently I managed to kill one of the MOSFETs to one of the motors. :-( I guess I am disappointed because it did not last that long. I only had about 2 hours of flight time with it. I don't think I will replace it immediately. It's rather expensive at $35 from Hobby King and that is about as cheap as they get. In the meantime, I will just use Hubsan control boards on all my home built quads. At $12 each, I can afford to play with those. Anyway, I have been re-tooling my FPV Racer quad with the carbon fiber frame. In preparation for the top plate that I should receive in a few days, I have pulled all of the FPV components off of the polycarbonate top plate and cleaned them of extraneous silicone. Here is the base so far...
At this stage, the quad is a crazy flier... weighing in at just under 30g. This is good because I will need as much power as I can get when I add the FPV stuff back. I have also begun work on the polycarbonate version... which I think I will use as a practice quad. It will be tougher that the carbon fiber quad, but should have all of the same flight characteristics.